写在前面
对于初学者来说,困难的不是理论知识,而是如何在程序中具体实现。
现在的项目基本上都是前后端分离的项目,如何打通前后端,接收前端传过来的参数呢?
废话不多说,这篇文章就来说一说接收前端参数的具体操作
一、获取路径中的值
1.1 核心代码
@GetMapping("/getArticle/{id}")
public Article getArticle(@PathVariable("id") Long id){
    System.out.println("获取到路径中的值为:"+id);
    return parmsService.findArticleById(id);
}
1.2 测试结果
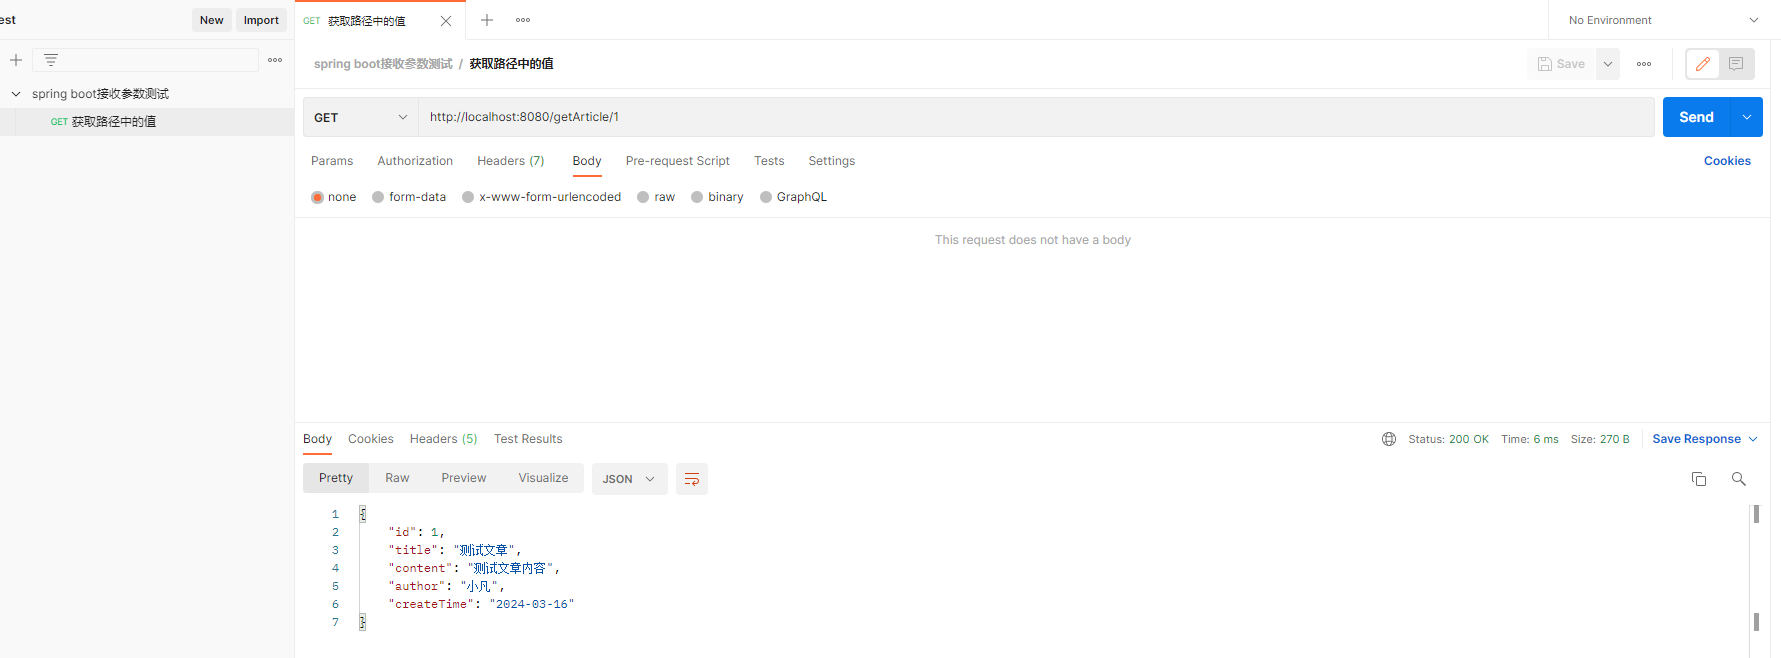
在访问“http://localhost:8080/article/1” 时,程序会自动将URL中的模板变量{id} 绑定到通过@PathVariable注解的同名参数上,所以程序中可以获取到id=1

二、获取路径中的参数
2.1 核心代码
@RequestMapping(value = "/addUser/",method = RequestMethod.POST)
public String addUser(String  name,String sex,int age){
    System.out.println("获取到参数中的值为:"+name+","+sex+","+age);
    return "添加文章成功";
}
2.2 测试结果
这里的参数和上面的不一样,这里的参数是通过“=”隔开的,多个参数使用&分割。 例如测试例子中的“http://localhost:8080/?name=小凡&sex=男&age=18”


三、通过Bean接收对象参数
3.1 核心代码
@Data
public class User {
private Integer id;
private String name;
private String sex;
private Integer age;
}
@PostMapping("/addnewUser/")
public String addUser(User user){
System.out.println(user);
return "添加用户成功";
}
3.2 测试结果
这里直接将前端传过来的参数映射到User 对象上


四、HttpServletRequest接收参数
4.1 核心代码
@PostMapping("/addBook/")
public String addBook(HttpServletRequest request){
    String bookName = request.getParameter("bookName");
    String author = request.getParameter("author");
    System.out.println("获取到参数中的值为:"+bookName+","+author);
    return "添加书籍成功";
}
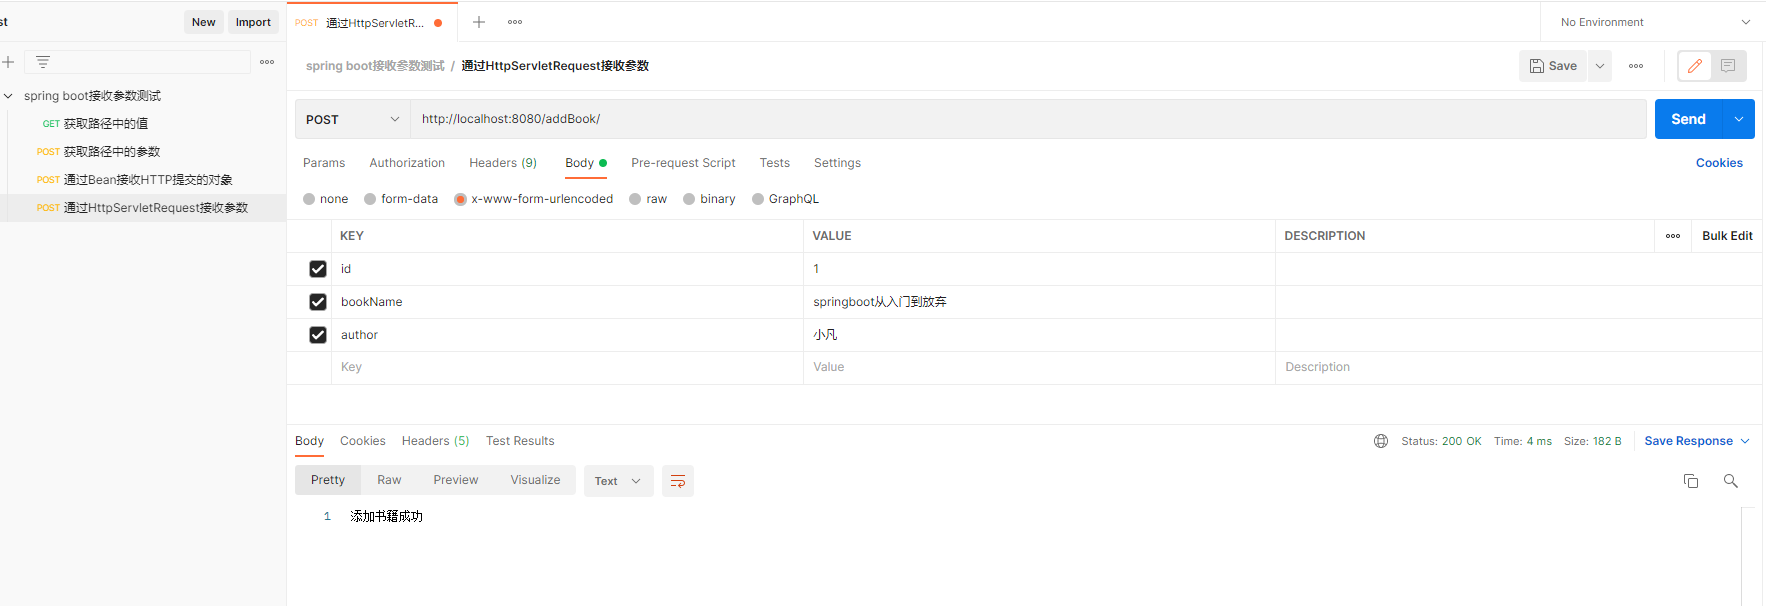
4.2 测试结果

五、用@RequestParam接收参数
5.1 核心代码
@GetMapping("/getParams")
public String getParms(@RequestParam("param1") String  param1,@RequestParam("param2") String param2){
    System.out.println("获取到参数中的值为:"+param1+","+param2);
    return "Param1: " + param1 + ", parm2: " + param2;
}
5.2 测试结果


六、 用@RequestBody 接收json数据
6.1 核心代码
@Data
public class User {
private Integer id;
private String name;
private String sex;
private Integer age;
}
@PostMapping("/addUsers")
public List<User> addUsers(@RequestBody List<User> users){
System.out.println(""+users);
return users;
}
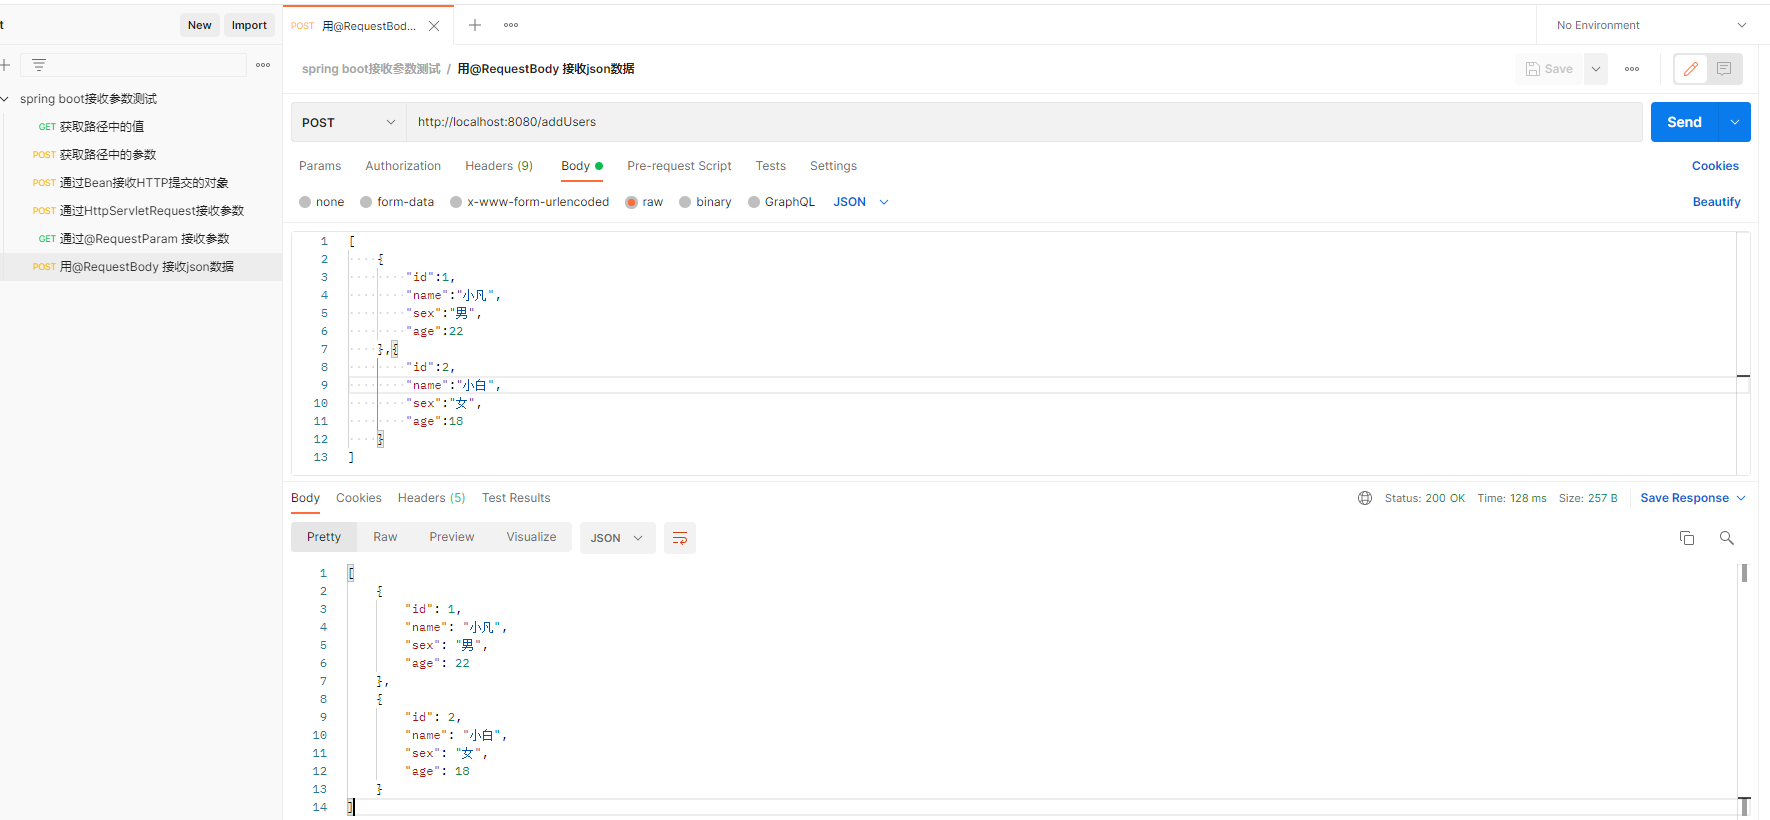
6.2 测试结果

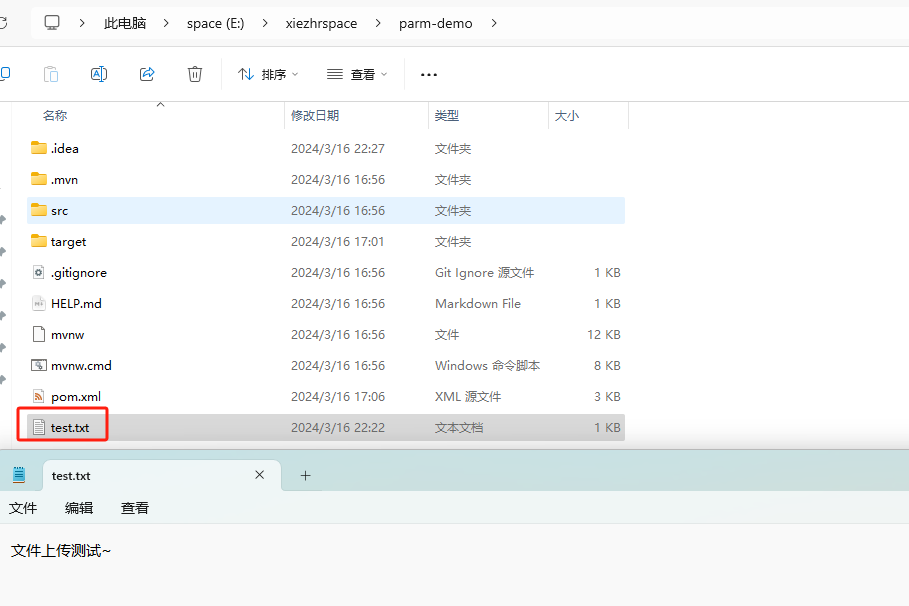
七、接收文件 MultipartFile
7.1 核心代码
@PostMapping("/singleFileUpload")
public String singleFileUpload(@RequestParam("file") MultipartFile file){
final String BASE_PATH = "E:\\xiezhrspace\\parm-demo\\";
if(file.isEmpty()){
return "文件为空";
}
String fileName = file.getOriginalFilename();
try {
File dest = new File(BASE_PATH + fileName);
if(!dest.getParentFile().exists()){
dest.getParentFile().mkdirs();
}
file.transferTo(dest);
} catch (IOException e) {
e.printStackTrace();
}
return "上传成功";
}
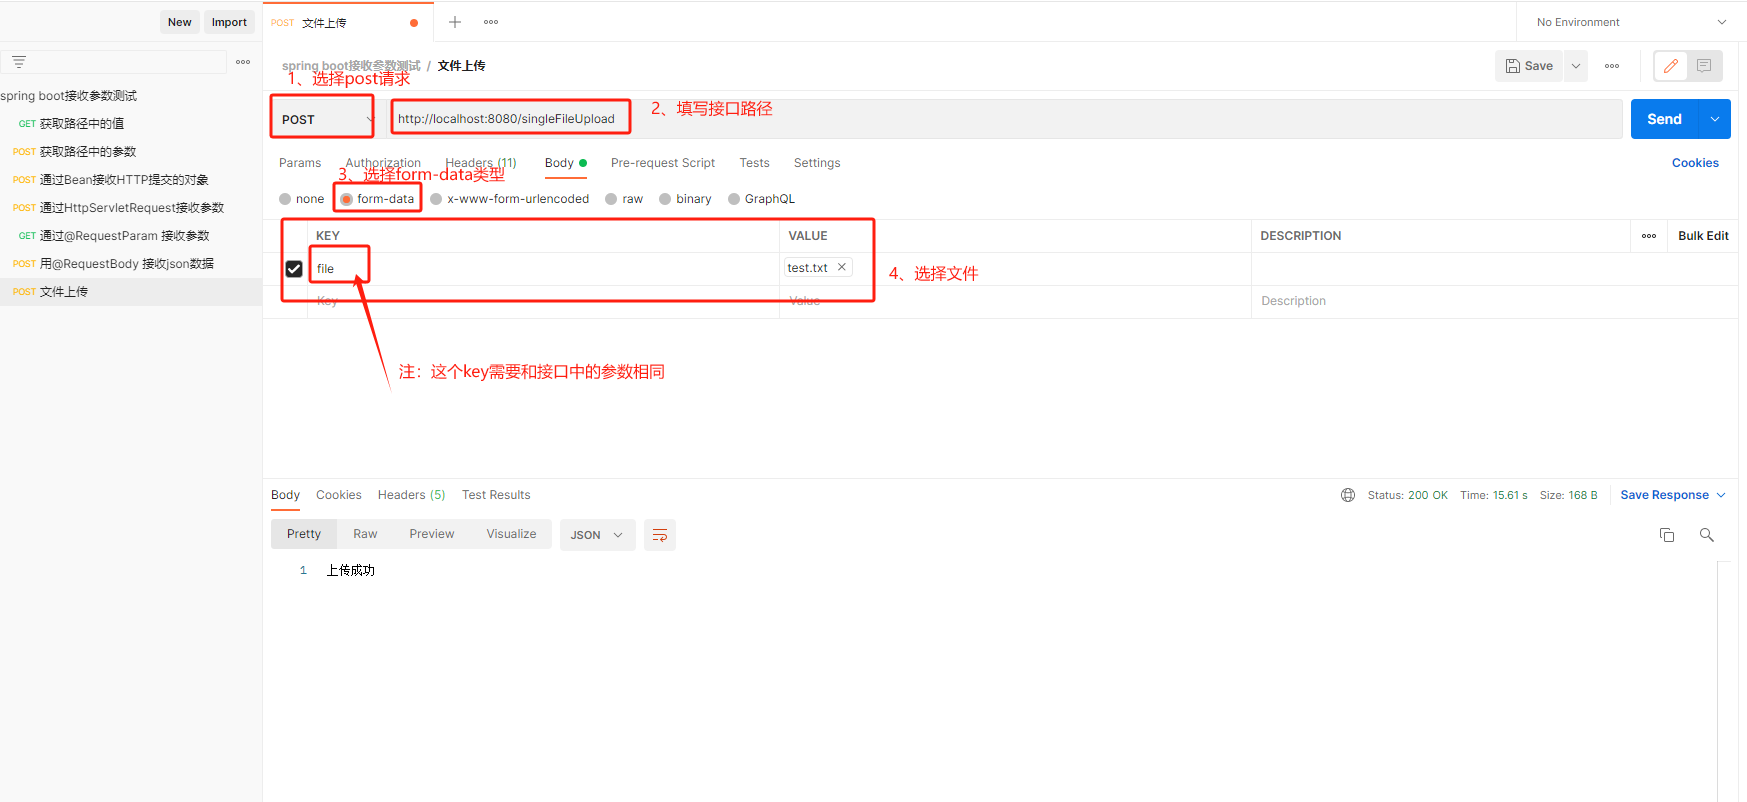
7.2 测试结果
以上就是本期全部内容,希望对您有所帮助,我们下期再见(●’◡’●)